Connecting wireless headphones to your laptop is simple, whether you’re using Bluetooth, RF (radio frequency), or a USB dongle. Below is a step-by-step guide for all connection methods, including troubleshooting tips.
Check Out: How to choose an audio DAC
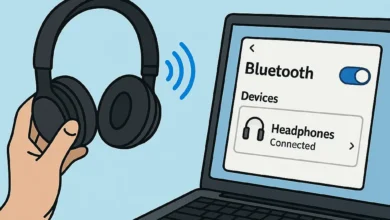
Method 1: Bluetooth Connection (Most Common)
Step 1: Enable Bluetooth on Your Laptop
- Windows:
- Press
Win + I→ Devices → Bluetooth & other devices → Toggle Bluetooth on. - Alternatively, check the Action Center (bottom-right taskbar) for a quick Bluetooth toggle.
- Press
- macOS:
- Click the Apple menu → System Settings → Bluetooth → Turn it on.
Step 2: Put Your Headphones in Pairing Mode
- Most headphones enter pairing mode when:
- Hold the power button for 5+ seconds until a light flashes.
- Pressing a dedicated pairing button (check the manual).
- Some models (like Sony WH-1000XM5) automatically enter pairing mode when powered on for the first time.
Step 3: Pair via Laptop Bluetooth Settings
- Windows:
- Go to Bluetooth & devices → Add device → Select your headphones.
- macOS:
- Click Bluetooth settings → Find your headphones → Click Connect.
Step 4: Set as Default Audio Device (If Needed)
- Windows:
- Right-click the volume icon → Open Sound settings → Select your headphones under Output.
- macOS:
- Go to System Settings → Sound → Output → Choose your headphones.
Method 2: USB Dongle (RF Wireless Headphones)
Some wireless headphones (like Logitech or gaming headsets) use a USB receiver instead of Bluetooth.
Step 1: Plug in the USB Dongle
- Insert the dongle into a USB-A or USB-C port (some adapters may be needed for newer laptops).
Step 2: Turn On Headphones & Auto-Connect
- Most RF headphones pair automatically when powered on.
- If not, check for a sync/pairing button on the dongle or headset.
Step 3: Verify Audio Output
- Go to Sound settings (as above) and select the correct output device.
Method 3: NFC Pairing (For Supported Devices)
Some headphones (like Sony or Bose) support NFC tap-to-pair.
Step 1: Enable NFC on Your Laptop
- Check if your laptop has NFC (common on some Lenovo, Dell, and HP models).
Step 2: Tap & Connect
- Turn on NFC in laptop settings.
- Hold the headphones’ NFC area near the laptop’s NFC spot (usually near the touchpad).
Troubleshooting Common Issues
1. Bluetooth Headphones Not Showing Up?
Fix:
- Ensure headphones are in pairing mode.
- Restart Bluetooth on the laptop.
- Update Bluetooth drivers (
Device Manager→ Bluetooth → Right-click → Update driver).
2. Connected but No Sound?
Fix:
- Check Sound settings → Set headphones as default.
- Disconnect and reconnect.
- Try another device to rule out headphone issues.
3. Audio Lag or Stuttering?
Fix:
- Move closer to the laptop (Bluetooth range is ~30ft).
- Avoid Wi-Fi/USB 3.0 interference.
- Use AptX Low Latency (if supported).
Final Tips
✔ For best sound quality: Use AAC (macOS) or AptX (Windows) if supported.
✔ For gaming: USB RF headsets (like SteelSeries Arctis) reduce latency.
✔ Battery saving: Turn off headphones when not in use.
Need help with a specific headphone model? Comment below!